Most of us take photos of our travels for memories and to share our rides with others.
For some riders, that cell phone in your pocket is all you will ever want or need. If you have a new phone, the image quality can be very good, and even better if you add the Pro Camera app because it gives you a lot more options.

Photo: rtwpaul
A little point-and-shoot camera could be a step up, if it gives you more control and options; there are a few great quality ones out there that are waterproof.
A bridge camera could be the next step up from the point-and-shoot, with more of the capabilities of a DSLR. You can’t change out lenses, but it has the ease of use of a compact camera and will (generally) give you better image quality.
The next evolutionary step up is to a proper DSLR or mirrorless camera. You may take this step if you are looking for a much higher quality image, possibly submitting photos and/or articles to magazines of your travels, or plan to blow some of your shots up to large poster size once you get home for framing.
…but where do you start, how do you choose what will work for motorcycle travel?
Since getting my photography degree a few decades back in college, I have gone through more than my fair share of cameras and lenses, and to be honest most would have failed miserably on motorcycle trips. They were just too delicate.
My current setup is relatively small, compact, durable, and functional to cover virtually every situation I find myself in.
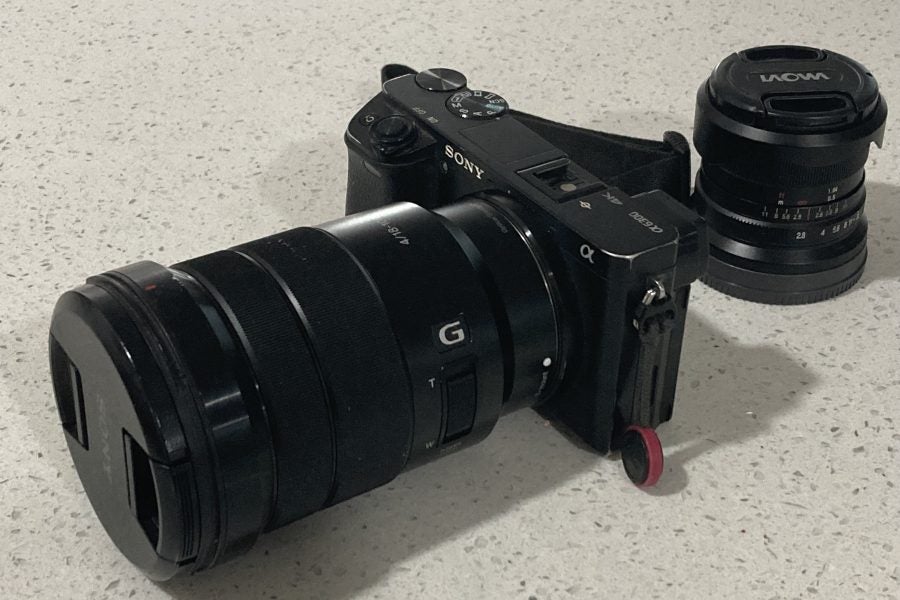
In my tank bag, this is my complete kit –
- Sony a6300
- Sony 18-105, f4 G zoom lens
- Laowa 9毫米,一生手动镜头

Photo: rtwpaul
In my luggage I also carry
- Aoka carbon fiber tripod, slightly too big to fit in my tank bag.

Photo: Amazon
I used to carry a selection of prime lenses but found I was using them less and less, and changing them opened up the chance for dust ingress and damage, plus of course this was added weight to carry.
Why this selection of gear?
The Sony a6300– is a small-sized mirrorless camera with huge capabilities. (no this isn’t a sponsored post by Sony!).
- 24MP Exmor CMOS sensor.
- 425个相位检测to give ‘4D Focus’ Hybrid AF.
- 4K (UHD) video – 25/24p from full width, 30p from smaller crop.
- 2.36M-dot OLED finder with 120 fps mode.
- Dust and moisture resistant magnesium-alloy body.
- Built-in Wi-Fi with NFC connection option.
- Built-in microphone socket.
The most important item on that list and why I bought it (for me) is that it is dust and moisture resistant. Once the lens is on, it is weather sealed.
The Sony 18-105, f4 G lens

Photo: rtwpaul
- power zoom, all zoom functions are done internally, so dust ingress isn’t possible
- weather sealed
- image stabilization
- works with Sony clear image zoom
That last item, clear image zoom, what is it?
Clear image zoom is a Sony feature that is hidden in the menu of this camera, and a few others allow you to enlarge the image by adding zoom with close to the original image quality when shooting still images.
The camera first zooms optically to the maximum optical magnification, then uses Clear Image Zoom technology to enlarge the image an additional 2x, producing sharp, clear images despite the increased zoom ratio.

Photo: rtwpaul
In short, with the click of a button my 105mm zoom is now a 210mm zoom with no loss of clarity!
There is also an option in the menu for Digital Zoom which will give 4x the zoom but reduce the image quality slightly.
What does this mean for adventure motorcycle riding and photography combined?
I now have an 18-105mm lens with a range of 18-210mm, with amazing quality of images, (420mm w/ digital zoom, lower quality). My camera is weather sealed, so I don’t have a concern about bringing my camera out in mild rain or dust storms. I very rarely have to remove the lens, so that means little to no chance of dust getting inside the body or on the sensor.
These shots are taken purposely at the standard lowest resolution the camera put out with no editing to show you the worst an image could be, but also the range, hi-resolution RAW images are dramatically better for processing.
-

- Shot at 18mm standard lo rez. Photo: rtwpaul

-

- Shot at 105mm standard lo rez. Photo: rtwpaul

-

- 在105毫米和2 xclear image zoom – standard lo rez. Photo: rtwpaul

-

- Shot at 105mm with 4x optical zoom – standard lo rez. Photo: rtwpaul

Why do I take the lens off occasionally?
I use my other Laowa 9mm manual lens for astrophotography. It gives me a lot more control when shooting the night sky.

Photo: rtwpaul
In conjunction with the manual lens for the night shots, I carry a smallish tripod, extremely lightweight carbon fiber that packs very small and is cheap (about $90). I’ve now been using this set up for around four years, and about 75,000 miles/120,000km. My only camera damage is the outer glass on the eyepiece of the viewfinder. To keep it all safe, the tank bag is surrounded by some heavy-duty packing foam. If you’ve followed my travels at all you’ll know I rarely ride paved/clean environments. I am primarily in the dirt, so my gear gets tested to it absolute limit daily!

Photo: rtwpaul
The images this camera set up has captured have been used in dozens and dozens of print magazines and websites worldwide and not once has an editor rejected an image due to lack of quality or sharpness. There isan additional article I also wrote for ADVrider.comabout how to always get tack sharp images, might be worth a read for some?
As this is a question I get asked regularly I thought it would be a good one to share, obviously what works for me, may not be suitable for you. If you have a different setup that is working well for your travels include it in the comments section below.