In-helmet communicators can help us to stay alert on long rides, chat with riding buddies, and cut out group-ride confusion. Installing a comm system in a helmet we already own and love means there’s no worry about whether the helmet with a pre-installed system will fit. It also means that when you need to replace the helmet, you can pull the expensive communicator out and put it in your new helmet.
All that is to say: it’s cheap and easy to install a Bluetooth communicator in your current full-face, modular, or ¾ helmet. You can install one in any modern helmet that covers your ears.
The install detailed below is specifically a Cardo system going into a Bell Star DLX helmet. I have installed Cardo and Sena systems of many flavors into Arai, Schuberth, Shoei, HJC and now Bell helmets, so I’ll say here: there are a few details that differ between helmets but they are similar for the most part, and installation procedure is pretty generalized.
Make Sure You Have Everything
首先,打开包and make sure everything is there. There are four things you’ll need to install: Speakers, the unit’s base, a microphone, and the unit itself.
Prep Your Helmet

The Bell has speaker “placeholders” behind the cheek pads. Photo: Kate Murphy
Next, pull out the helmet cheek pads (they are held in by snaps) and anything else that seems to be in the way. I install the wiring around the edge of the helmet, so I generally pull off the skirt around the base, as well.

Note the comm system’s base will need to be forward of the skirt’s anchor point. Photo: Kate Murphy
Step One: Speakers
Start with the speakers. Since the comm will be mounted on the left side of the helmet, the speaker with the longer wire goes on the right. Every modern helmet I have installed any communicator in, has indents to accommodate the speakers. This Bell has indents that are filled in with small pieces of foam. Remove those, install the correct hook-and-loop in the spaces, and set the speakers into the indents. Generally I place them so that the wires aim for the crown of the helmet, so they can be led up and out of the way. There should be some space in the helmet’s speaker indents, so you can adjust the speaker placement to be exactly where you need them.

Speaker wire goes up and back, so it can be secured. Photo: Kate Murphy
Step Two: Install the Communicator’s Base
Next, once the speakers are fitted, find the spot to mount the communicator’s base. It will come with two options: a clamp or stick-on. The “fingers” of the clamp slide up into the helmet between the outer shell and the inner hard foam, and there are spots where the helmet skirt slides back in, so install it to either side of these posts. I install mine a bit forward. Work the “fingers” up into the helmet and make sure it’s not easily coming loose. Sneak the wires into a gap in the helmet foam.
Step Three: Route the Speaker Wires
Now, route the wires. The right side speaker wire can either be loosely placed under the soft helmet crown padding, or, as I prefer, wedged around the edge of the helmet. I tend to install all communicator wiring where it absolutely cannot move. The more a wire moves, the more the tiny metal wires inside will fatigue, and eventually break. An “orange stick” is a great tool for this. It’s made out of soft wood, so there’s less chance you’ll damage the wire insulation, but it will help you wedge the wire up between the hard foam and the helmet shell. Be very careful not to damage the hard foam.

Be very gentle with these tiny wires. We want them perfectly secure. Photo: Kate Murphy
Step Four: Find a Spot for the Plugs
Sena communicators use tiny plugs to attach the speakers and mic that can sneak into any indent inside a helmet. Cardo uses a large, standard 3.5mm aux jack, though, so you’ll need to find a good spot to hide that. This Bell has a good spot just under the left speaker. You can also stuff it between the soft helmet liner and the skirt on reinstall, but I like mine more hidden.

The cheek pads, snapped in, will hold all this in place. Note the placement of the wires from the base; needs more slack. Photo: Kate Murphy
Step Five: Place the Microphone
接下来,找到一个好点的麦克风。如果你的re installing in a full-face helmet, you’ll use the small wired mic. If you’re instead using a modular or shorty helmet, you’ll need the boom mic. (Note, some systems come with both as a default, and some (Sena) systems are helmet-type specific in the packaging. Pay attention when you purchase, and make sure you’re buying the correct model).
This Bell has a nifty rubber strap in the chinbar that serves as a great wire anchor for the mic. Other helmets do not, but you will have hook-and-loop fastener to stick on there. Make sure to use a little rubbing alcohol to clean the area before you do so, so it sticks. The mic should be as close to right in front of your mouth as possible, with preference to placement just between your nose and upper lip, or just barely off to one side. This way your speech will be as clear as possible through the communicator, but won’t pose a hazard to your chin in an unplanned off-bike excursion.
A modular helmet will need a boom microphone, and that installation is the same. Just be sure the microphone can reach the front of your face and place the hook-and-loop stickers accordingly.

Microphone placement, with options for moving it around later. Photo: Kate Murphy
Step Six: Secure the Rest of the Wires
Now, place the microphone and plug it in. Route the wiring from the communicator to the left side speaker and microphone. Tuck the wiring away as securely as possible, using the orange stick to wedge it into gaps in the hard foam. The goal here is to make sure all the wiring stays as still as possible while you don, doff, and ride in the helmet. Again, these tiny wires fatigue easily.
Reinstall the helmet skirt, making sure the wiring has enough slack. Snap the cheek pads back in and make sure all the wiring is secured behind them, and nothing will rub on your ears while you ride.

The helmet skirt gets reinstalled after the base, so everything is tidy. Photo: Kate Murphy
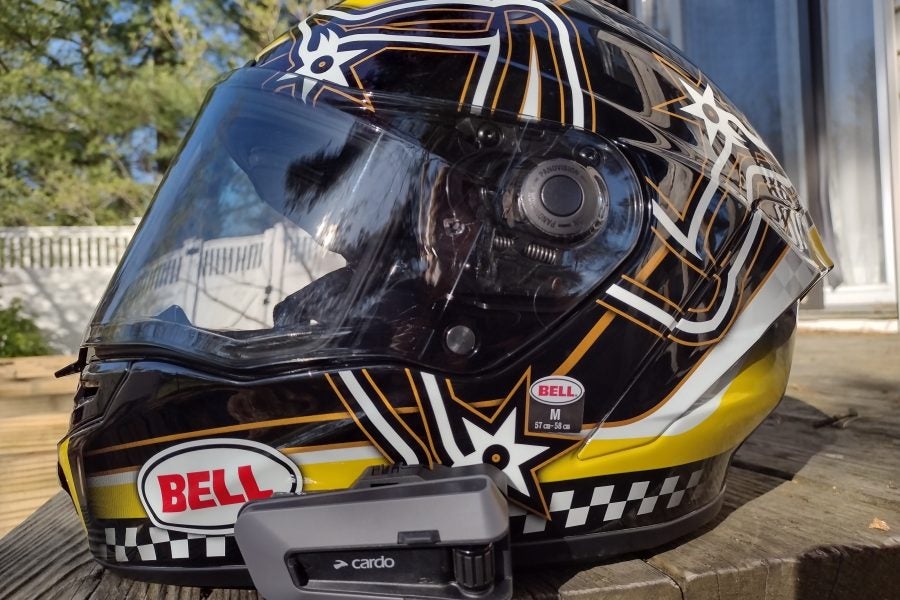
A quick note about this Cardo: it is the Packtalk Edge, which means the mount is magnetic. It’s easily the best communicator mount I have experienced among (many Sena SMH10, 10C, and Cardo Packtalk Bold) systems I’ve installed. The SMH10 mount is fragile and easily missed, and the 10C wears out too easily on the communicator (expensive) side. I have a strong preference for a communicator that detaches from the helmet for charging. Group trips often see a bunch of comms all plugged in at the same outlet at the end of the day. The Edge has the advantage of an updated USB-C charging port, so I won’t have to pack a separate micro USB to charge my helmet.
The Bell Star MIPS helmet is slightly pickier than other helmets I’ve installed communicators in (the easiest being a Shoei Neotec), but reassembles more easily than any Arai I’ve worked with.